The Signer Experience
What happens after you click Send? This article shows the process from the signer's side — useful for onboarding your counterparties, and for choosing the right signing mode per recipient.
Opening the Request
- The signer receives a branded email with a personal signing link. Links are unique per signer and only work when it is that signer's turn.
- If you set an access code, the signer must enter it first. Failed and successful attempts are recorded in the audit trail.
- The document opens in the browser — no account, no installation (for electronic signing), works on any modern browser.
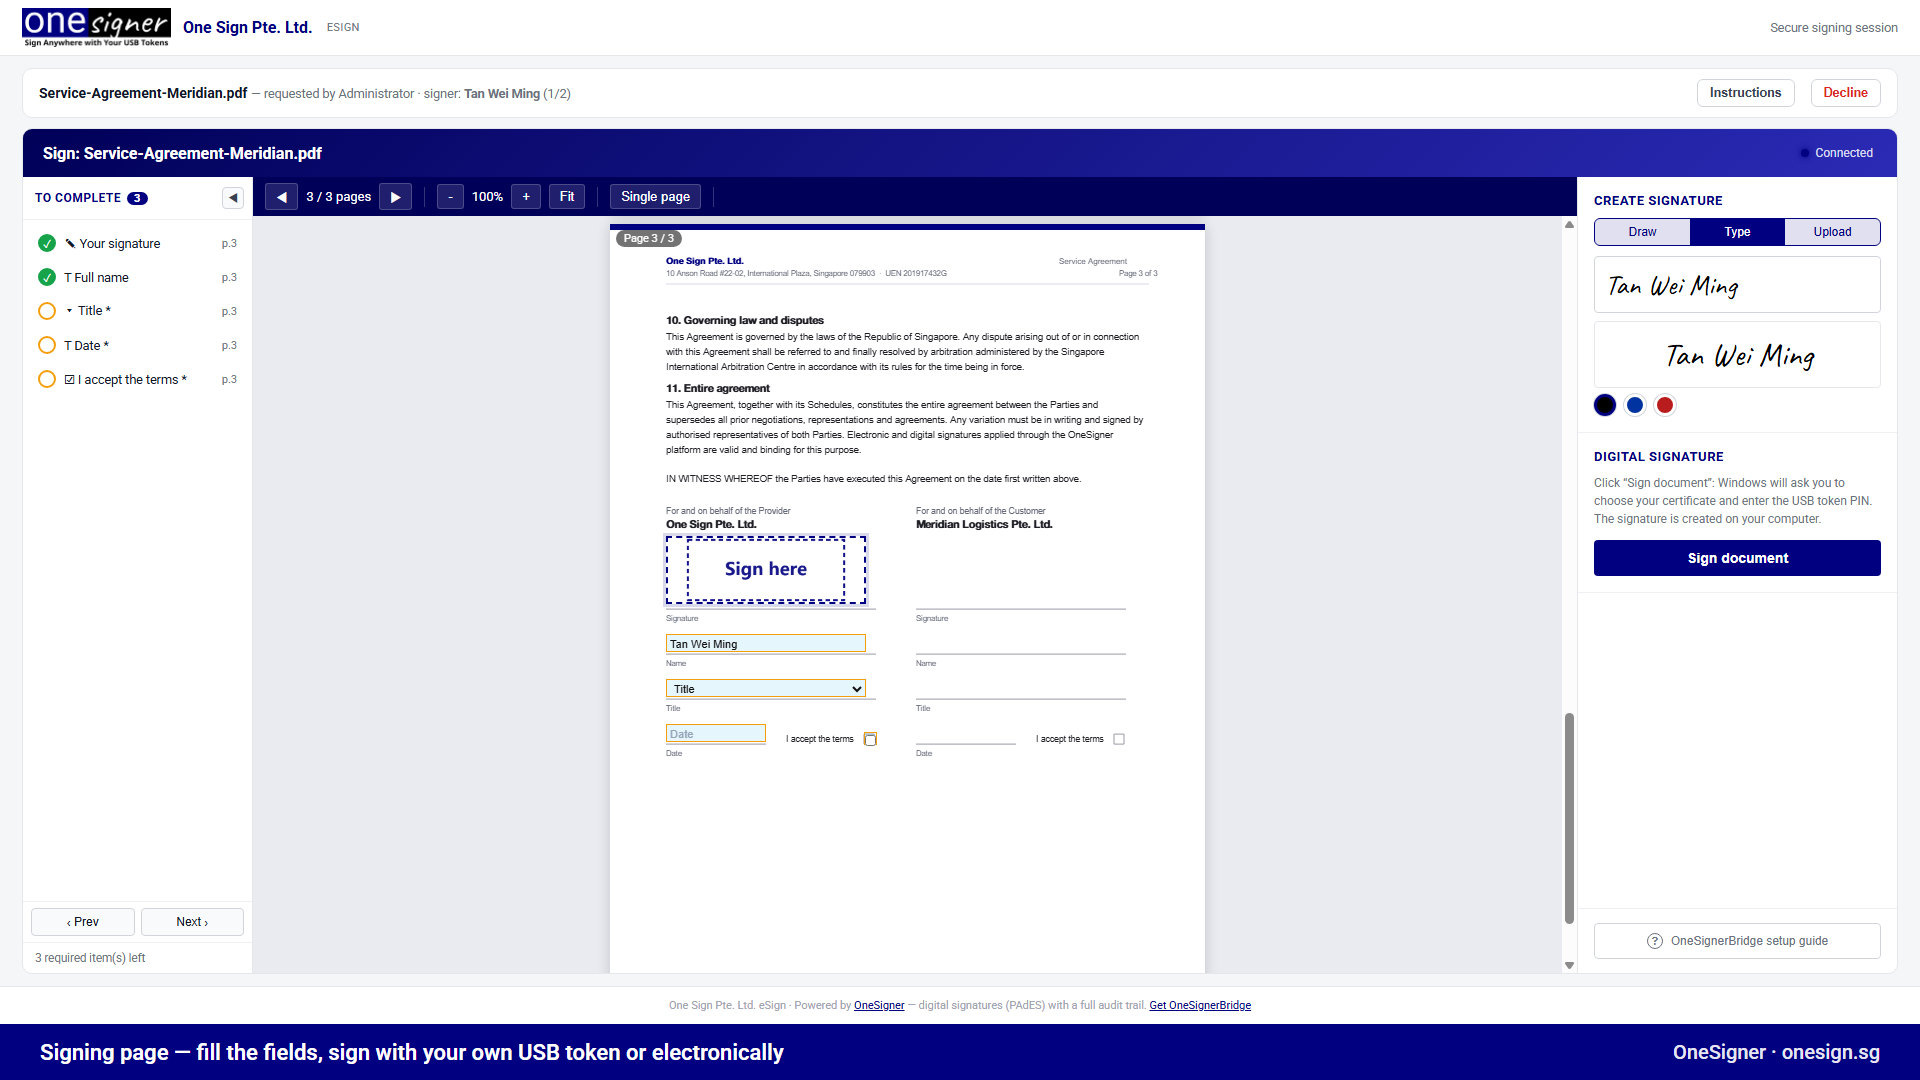
Filling In the Fields
- A To complete checklist on the left lists every required field with its page number; clicking an item jumps to it.
- The signer fills their text fields, checkboxes, radio groups and dropdowns directly on the page.
- For the signature image they can Draw, Type (script font), or Upload an image, and pick the ink colour.
Signing Mode 1: Personal Digital Signature (USB Token)
For signers who hold their own signing certificate on a USB token:
- The signer installs the free OneSignerBridge helper once (download link is offered on the signing page) and plugs in their token.
- Clicking Sign document triggers the Windows certificate picker and token PIN prompt on the signer's own machine.
- The signature is created locally: the server prepares the document, the browser sends only the hash to the Bridge, and the token computes the signature. The private key never leaves the token.
The result is a personal PAdES digital signature — the signer's own certificate appears in Adobe Acrobat's signature panel.
Signing Mode 2: Electronic Signature + Organisation Seal
For signers without a token (the common case for external customers):
- The signer draws or types their signature and submits — nothing to install.
- The server stamps the signature image and field values into the PDF, records the audit event, and then seals the document with your organisation's digital certificate (the "seal profile" you configure under Settings → eSign).
The seal is a genuine digital signature by your organisation, so the completed file still carries cryptographic proof of integrity even though the individual signed electronically.
Setup: in the web portal, Settings → eSign → Seal profile for electronic (no-token) signatures — select a PDF signing profile whose certificate/token is available on the server. You can also disallow electronic signing entirely if your policy requires tokens.
Declining
A signer can Decline with a reason. The request is marked declined, remaining signers are not invited, and the owner is notified by email. The document owner can then fix the issue and clone & re-send.
Sequential Order, Enforced
- Only the signer whose turn it is can open the ceremony; others see a "not your turn yet" message until invited.
- When a signer completes, the next signer is emailed automatically.
- Each signer produces a separate PDF revision — earlier signatures remain valid and visible.
After Completion
Every signer's link offers View (built-in browser viewer) and Download of the completed document. The owner sees the same plus the full audit trail under Sent for signature.