Sending a Document for Signature
Aug 21, 2026 · 379 views
This guide walks through sending a document for signature — from upload to a completed, fully signed PDF.
Step 1: Upload to My Documents
- In the web portal, open My Documents.
- Drag one or more PDFs onto the upload area (or click to browse). Optional: set a category and tags for easier filtering later.
- Uploaded documents stay private to your account until you send them.
Step 2: Prepare — Recipients and Fields
Click Prepare & send on the document to open the builder:
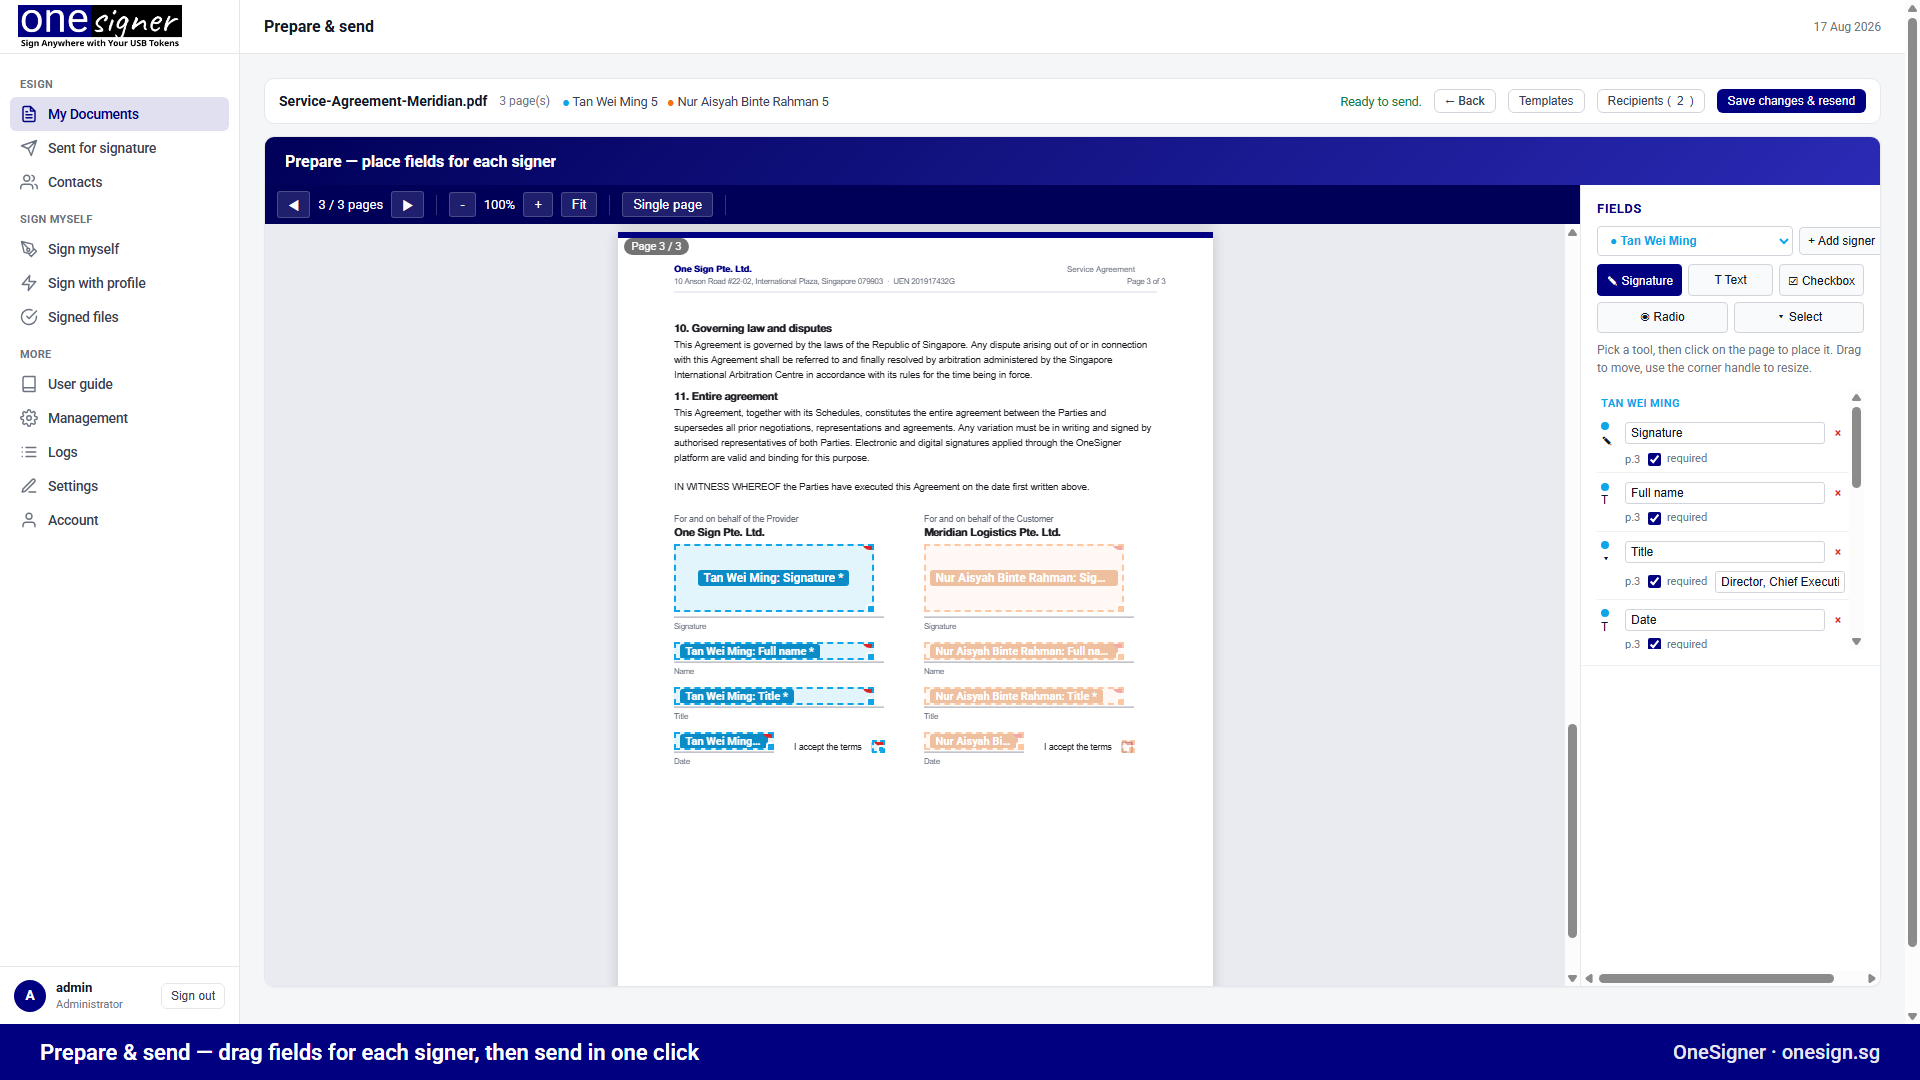
- Add recipients via the Recipients button: name and email for each signer, or pick them from Contacts. The order you list them is the signing order — signer 2 is only invited after signer 1 completes.
- Optional per signer:
- Access code — the signer must enter it before opening the document. Share it via another channel (SMS, phone).
- Signing mode — personal USB-token digital signature, or electronic (draw/type) signature. See The Signer Experience.
- Place fields: select a signer in the palette, pick a tool — Signature, Text, Checkbox, Radio, or Select (dropdown) — then click or drag on the page. Move by dragging, resize with the corner handle. Fields are colour-coded per signer.
- Mark fields required or optional; text fields can carry labels and pre-filled values; radio groups support min/max selections.
- Every signer needs at least one Signature field — the builder will remind you if one is missing.
Step 3: Send
- Add an optional message — it appears in the email and on the signing page.
- Click Send. Signer 1 immediately receives an email with their personal signing link. If SMTP is not configured, copy the link from the portal and deliver it yourself.
Step 4: Track Under "Sent for signature"
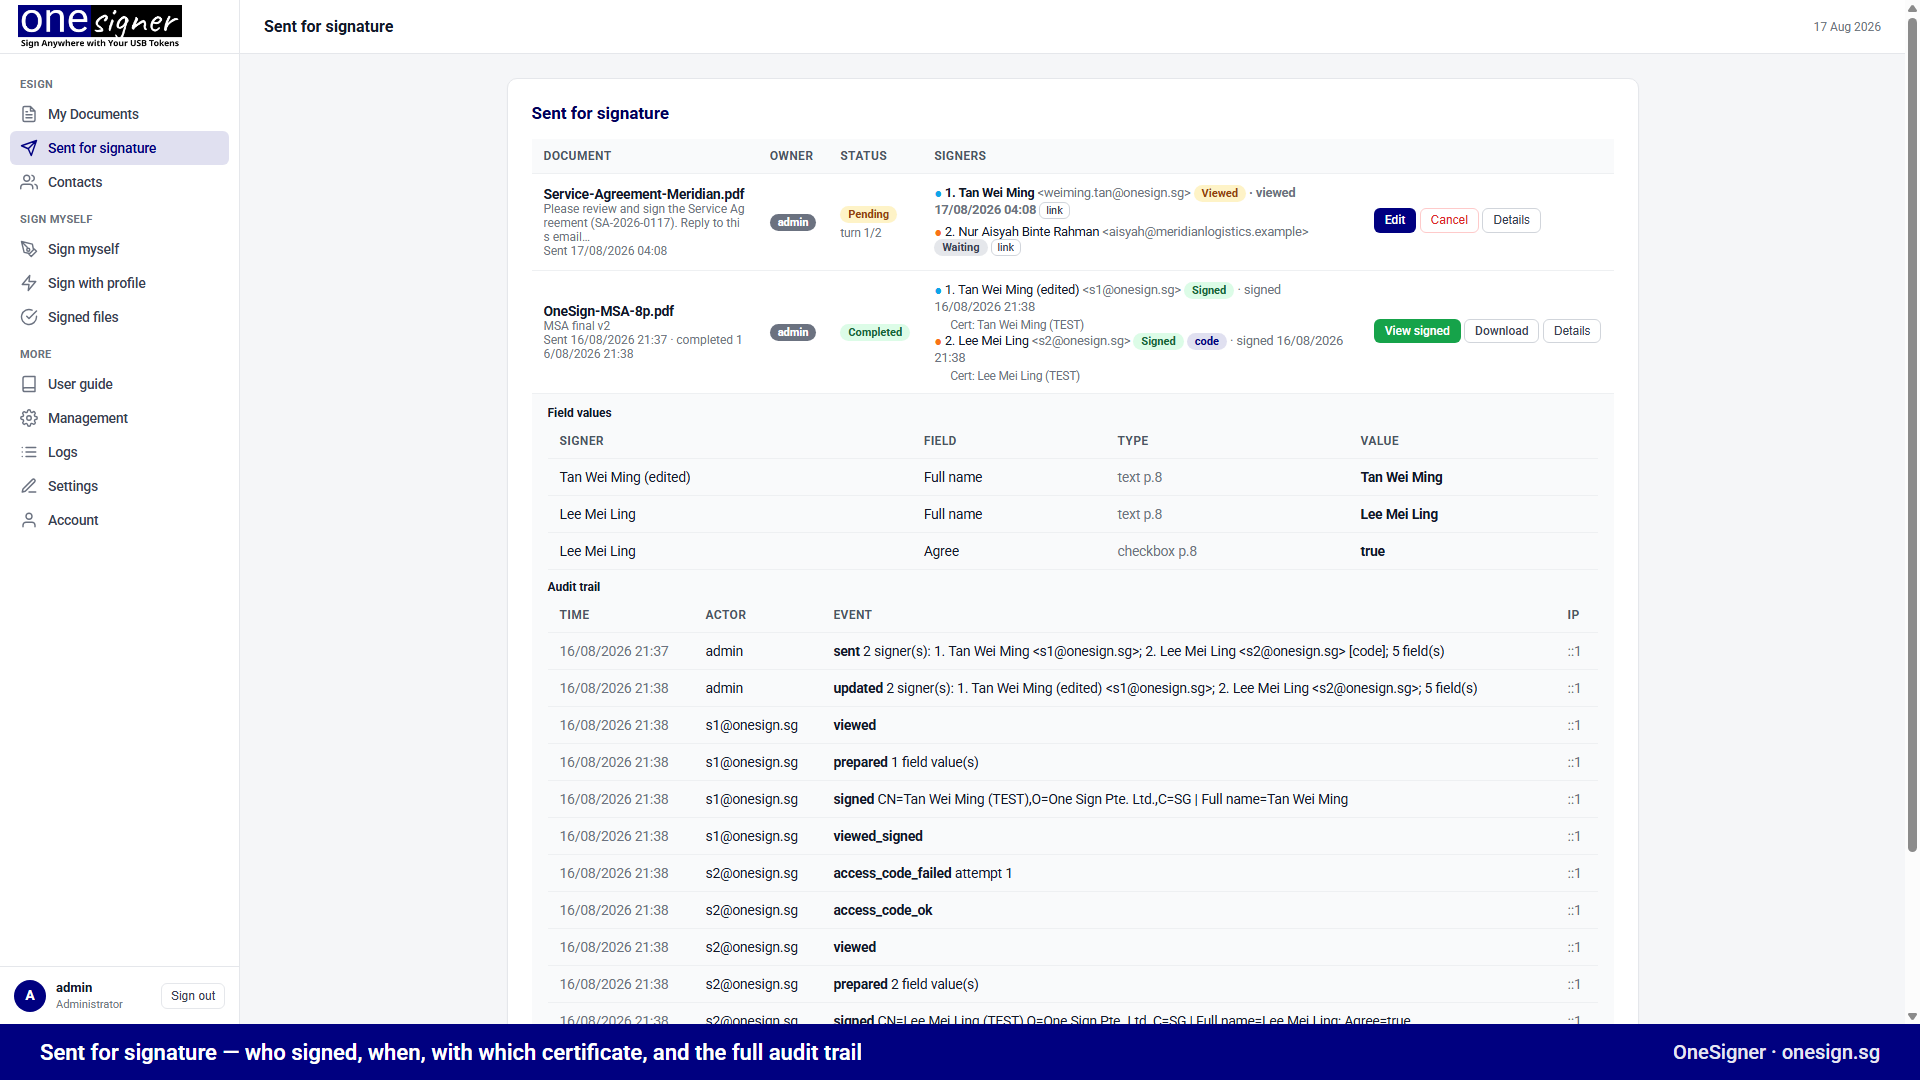
- Status per signer: waiting → viewed → signed (with the certificate used), plus whose turn it is.
- Details shows submitted field values and the complete audit trail: sent, viewed, access-code attempts, prepared fields, signature events with certificate subject — each with timestamp and IP.
- Available actions while pending: Edit (until the first signature is made), Resend email, Cancel.
- When everyone has signed: View signed opens the built-in viewer; Download fetches the final PDF.
Tips
- Reuse layouts with templates; send one document to many people with bulk send.
- Set a default expiry and automatic reminders in Settings → eSign so requests don't linger forever — see Reminders, Expiry & Corrections.
- Sending outside your LAN? Publish the portal on a public HTTPS URL with the built-in Cloudflare Tunnel (Custom Domain tab in the configuration app).